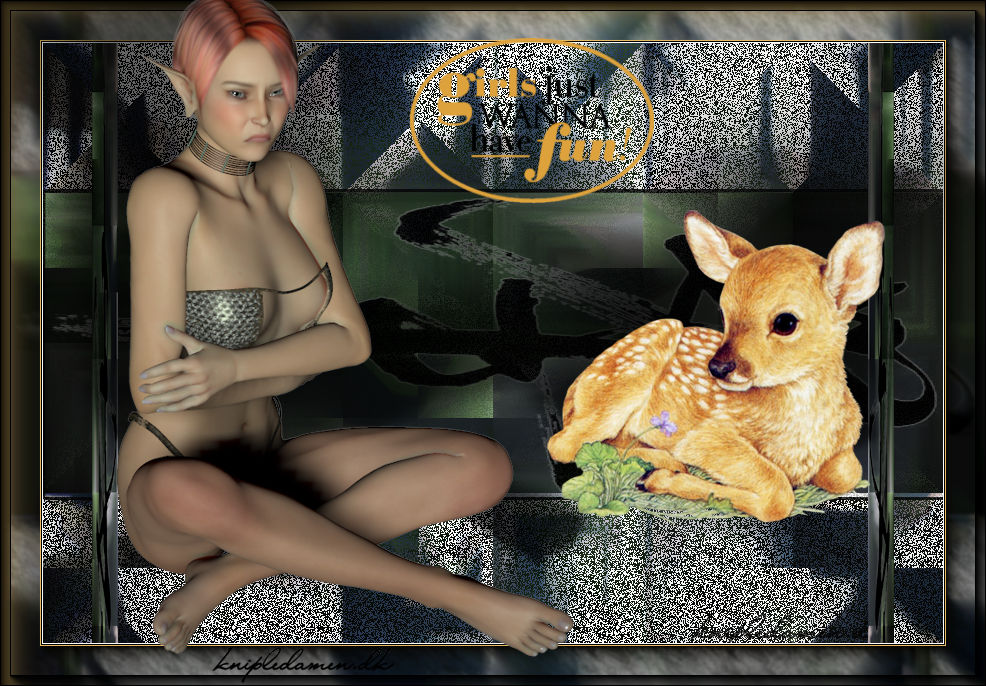
angry-fariy-inglish
Thanks
to Dennis Robinson for Translating My Tutorial into English
Place
the Selection / Sel_AngryFairy_kniple in Your Selections Folder
The
rest Opens in PSP
Open a New Image 900 x 600
Selections
/ Select All.
Edit
/ Copy the Image / Forest Floor
Edit / Paste into Selection
Selections / Select None
Effects
/Plugins / Mehdi /Sorting Tiles
(see
example)
Layers
/ Duplicate
Repeat
/ Mehdi Sorting Tiles (this time check Plus)
Activate the Top
Layer
Layers
/ Properties / Blend Mode / Dissolve / Opacity 44.
Image / Flip
Vertical
Selections / Load/Save Selection/ Load Selection from
Disk Sel_AngryFairy_kniple
Open the Image / Aimelle
tube_symbol4
Close for use later
Activate
the tube layer,
Image / Free Rotate 90
(see example)

Edit
/ Paste into Selection
Selections / Promote Selection to Layer
Layers
/ Properties / Opacity 77
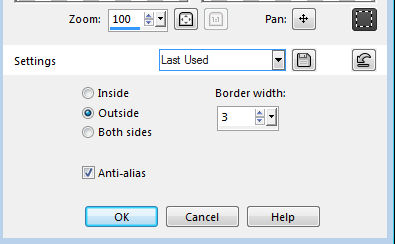
Selections / Modify / Select Selection
Borders (see
example)
Flood
Fill / Black
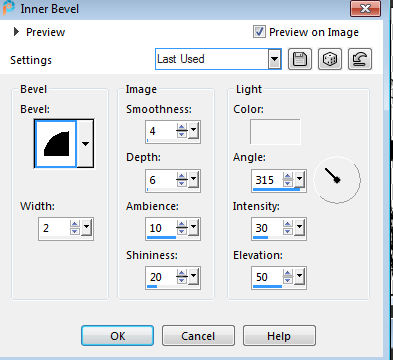
Effects / 3d Effects / Inner Bevel (see
example)
Selections
/ Select None
Layers / Duplicate the Promoted Selection
Image
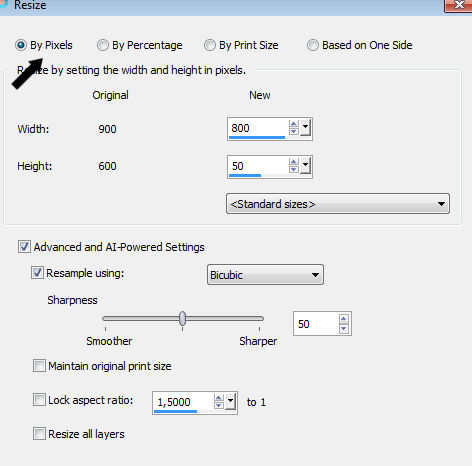
/ Resize (see
example)
Image
Free Rotate / Right 90º
Move to the Right.
Layers / Duplicate
Image
/ Mirror / Mirror Horizontal
Image / Add Borders
1 pix White
1 pix Black
1
pix #e6bb63
Selections / Select All
Edit / Copy
Image
Add Borders 40 pix White
Drop Shadow of your
choice.
Selections / Invert
Paste into
Selection
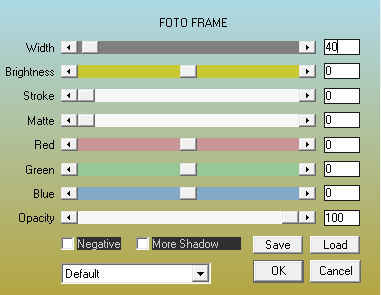
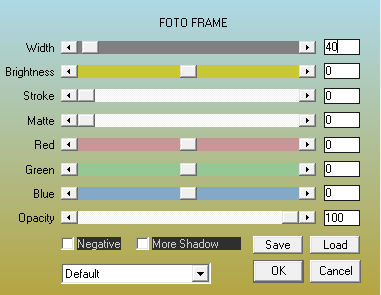
Effects / Plugins / AAA Photo Frame (see
example)
Repeat
/ AAA Photo Frame / change the Width to10
Selections / Select
None
Edit
/ Copy / Image Angry_Fairy_kniple
Edit
/ Paste as a New Layer.
Image / Resize 90% (no
check mark in resize all layers)
Copy Image Bambi_kniple
Edit
/ Paste as a New Layer
Give both tubes Drop Shadow of your
choice.
Open the Wordart
Edit / Copy
Edit
/ Paste as a New Layer
Adjust / Hue and Saturation / Colorize
Hue
28 / Saturation 185 (place
as mine)
Add
your name or watermark
Save as jpg
